Why filament cards are useful.

One thing I learned while printing 3D is that a lot depends on which printer you use, what and how you print, and what filamants you use. This blog entry is a “this is how I do it and what works for me, and why it works for me”, other people may have different opinions based on how/what they print and which filaments they use, and that is totally fine. If filament cards are something new to you or something you are interested in, I’m happy to share my experiences and knowledge here with you. Links to models in the pictures here are at the bottom of the blog post.

What is a filament card

A filament card (or color swatches, or whatever you want to call them) is basically just a small card. It’s design can range from a plain rectangle for color reference, or have features built into it like different layer depths, bridging and wall strengths. It can any shape, but rectangles are often used, but I’d suggest using the same shape/model for all cards.


Why are filament cards useful?

Printing filament cards when you get a new roll of filament is a habit I’d suggest getting into early. They allow you to easily reference or compare colors and printing results to chose the right filament for the job. They are also useful if you get samples from a product.
If you were ever trying to decide “which of these blues would look best for what I need to print” or “which of my filaments had the best bridging results”, then this is a system you will enjoy.

filament cards


Labeling

Some people creates cards for each specific filament, printing the name and settings (e.g. temperature) directly into or onto the card. While I find this neat, I wanted to avoid having to create a new card for each filament (since newer slicer versions may create different gcode and I’d be comparing not only filament A to filament B, but also different slicer results, and the name can be quite long depending on how much information I want to present). The upside to only having one STL/gcode for all cards is that is is easy to manage and compare results. The downside is that a) I need to label the cards in a different manner, and b) adjust the temperature settings for the filament on the printer.
For labeling I use a traditional label printer (as seen on the pictures), and document manufacturer and color of the filament (I only add the temperature if it is unusual). On the pictures above I put the label on the front, but on the latest cards I’ve printed I’ve started placing the label to the back since there is more space there (back surface quality is mostly dictated by the printer bed and less interesting), the front does a better job of showing the surface quality of the filament, and in the back the label doesnt interfere with the tray slots.

Card features

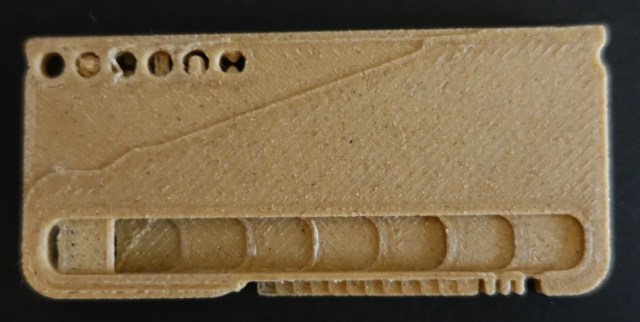
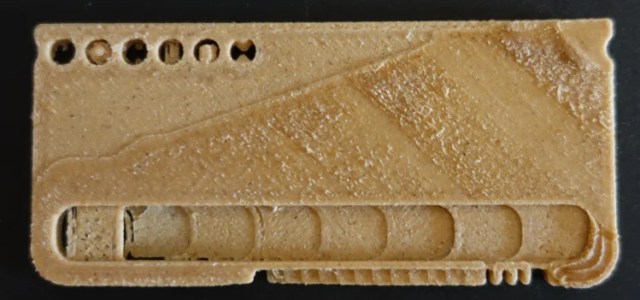
Comparing colors and the “feel” of the filament is what I use the cards mostly for, but I also chose a cards with a few extra “features” that come in handy. The cards I use are a little bit higher than what you normally see to give me more room for the label and more material to compare. On the top there are a few small tests (round ball, wall with hole, bridging, cylinder only supported on one end, slanted surface), the card isn’t uniformly square on the outside (some edges are rounded). On the top we have square corners, on the bottom round corners. The bottom part of the card starts off with an unsupported bridge, then slowly increasing card thickness (if you hold the card up against a light, you can see how translucent the card is at which thickness). Along the bottom edge ther is an overhang test, another thickness test with more gradients and a wall thickness test.

There are a variety of simpler and more complex cards out there, pick whatever is useful for you and what you print (or make your own).


filament card front
Front
filament card back
Back

Storage

Some people put their cards on zip ties or rings, some just collect them loosely. I like to put they cards in trays and sort by filament type and color. Trays come in all sorts and sizes, but should be high enough to keep the cards from falling out, and low enough to easily remove individual cards.

filament card tray

Where to get

Thingiverse has plenty of options if you search for “filament card”. I personally prefer customizable objects that I can tweak with OpenSCAD to my liking. I’d suggest saving the STL file and generating the gcode files once and using the same files for all filaments, since slicer software updates and changes over time, and you want to compare filaments and not slicer results. I have two files, for 0.4mm, and 0.6mm nozzles (since some filaments require a larger nozzle).

I can highly recommend the following card and card tray (these are the ones used in the pictures above):

Customizable filament cards: thingiverse 3346069
Customizable tray thingiverse 3595869