Visualizing Exim logs with Graylog
I spent some time the last few days tweaking my mail server settings since there has been an annoying rise in spam lately. Nothing special, mostly spring-cleaning of the blocklists and Spam Assassin settings. But as I was going over my config, I realized I didn’t have any way to measure “success”. I don’t really know which Blocklists work well for me and which don’t.
I use Graylog to collect logs from my systems and applications. But as far as my Exim logs are concerned my setup was pretty barebones (i.e. not parsing any fields, just dumping them as they were into Graylog). So I spent some time setting up proper extractors for my Exim logs to store everything useful in fields. A lot of the Exim logs use a straightforward key=value structure, making them easy to parse.
(spoiler: I bundled up everything here as a Graylog Content pack in case anyone wants to use it. Link at the bottom of the post)
Once the logs were properly parsed, I moved on to Dashboards to visualize the data. I started out with a visualization of the score Spam Assassin assigns to incoming emails (negative is good, positiv is bad, it’s been years since I’ve seen anything above a score of 5.0 that wasn’t spam). This gives me an indication of the quality of the mail making it through filters to my mailbox.
Then a little overview of incoming and outgoing mail, and how much is discarded by SPF and DNSBL.

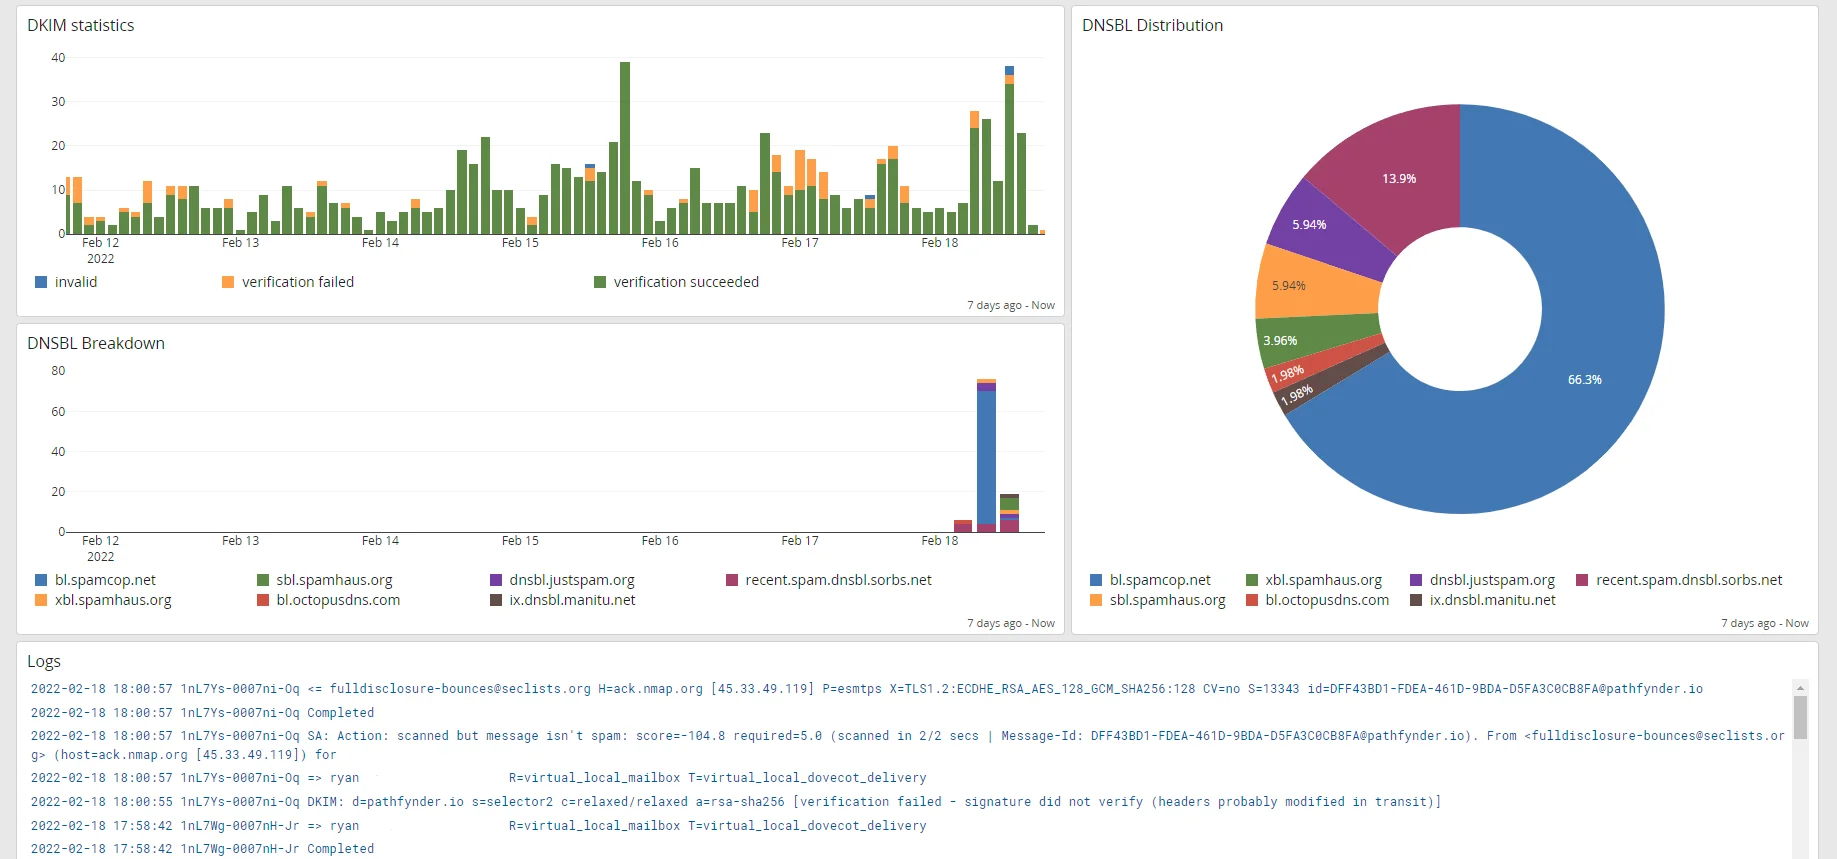
This dashboard s the most interesting one when it comes to deciding which DNSBL lists are useful and which aren’t. It shows which lists are finding spambot globally as well as over time.
All my dashboards also have a widget with the relevant logs from the dashboard underneath to have easy access to the raw logs.

Since I had the data anyway, I also create a dashboard to show transport encryption information. About 60% of mail servers seem to support transport encryption, which is a lot lower than I would have expected (since it is easy to configure). I didn’t dig deeper into this, but I wouldn’t be surprised if the 40% sending email using plain unencrypted methods are mostly spammers that have very simple bots running to send their email.

This dashboard is technically also not related to spam, it’s bots trying to brute force user accounts on my mail server to abuse them to send more spam. Fairly aggressive fail2ban settings take care of that though.
It’s interesting to see, that the botnets aren’t used solely for sending spam, they are also used to try and compromise mail server accounts to increase the volume of mails they can send.


